
In this article we are going to give you some practical advise on how to delete the background on your logo or picture, so you can make sure they will be safe for printing. If you follow the steps of this tutorial, you will be able to get professional results on your merchandising products or personalised presents, but if you just want to know how to delete the background you can go straight to the explanation on how to delete backgrounds for Photoshop or with GIMP.
You might think about using one of your very own drawings to create a textile product but you are not sure on how to avoid the unwanted „sticker effect“ with a white background that we get after a simple scanning when we want to print the image right on the coloured textile. Thanks to Adobe Photoshop and Illustrator it’s possible to get really original results as you don’t need to be an expert to do it!
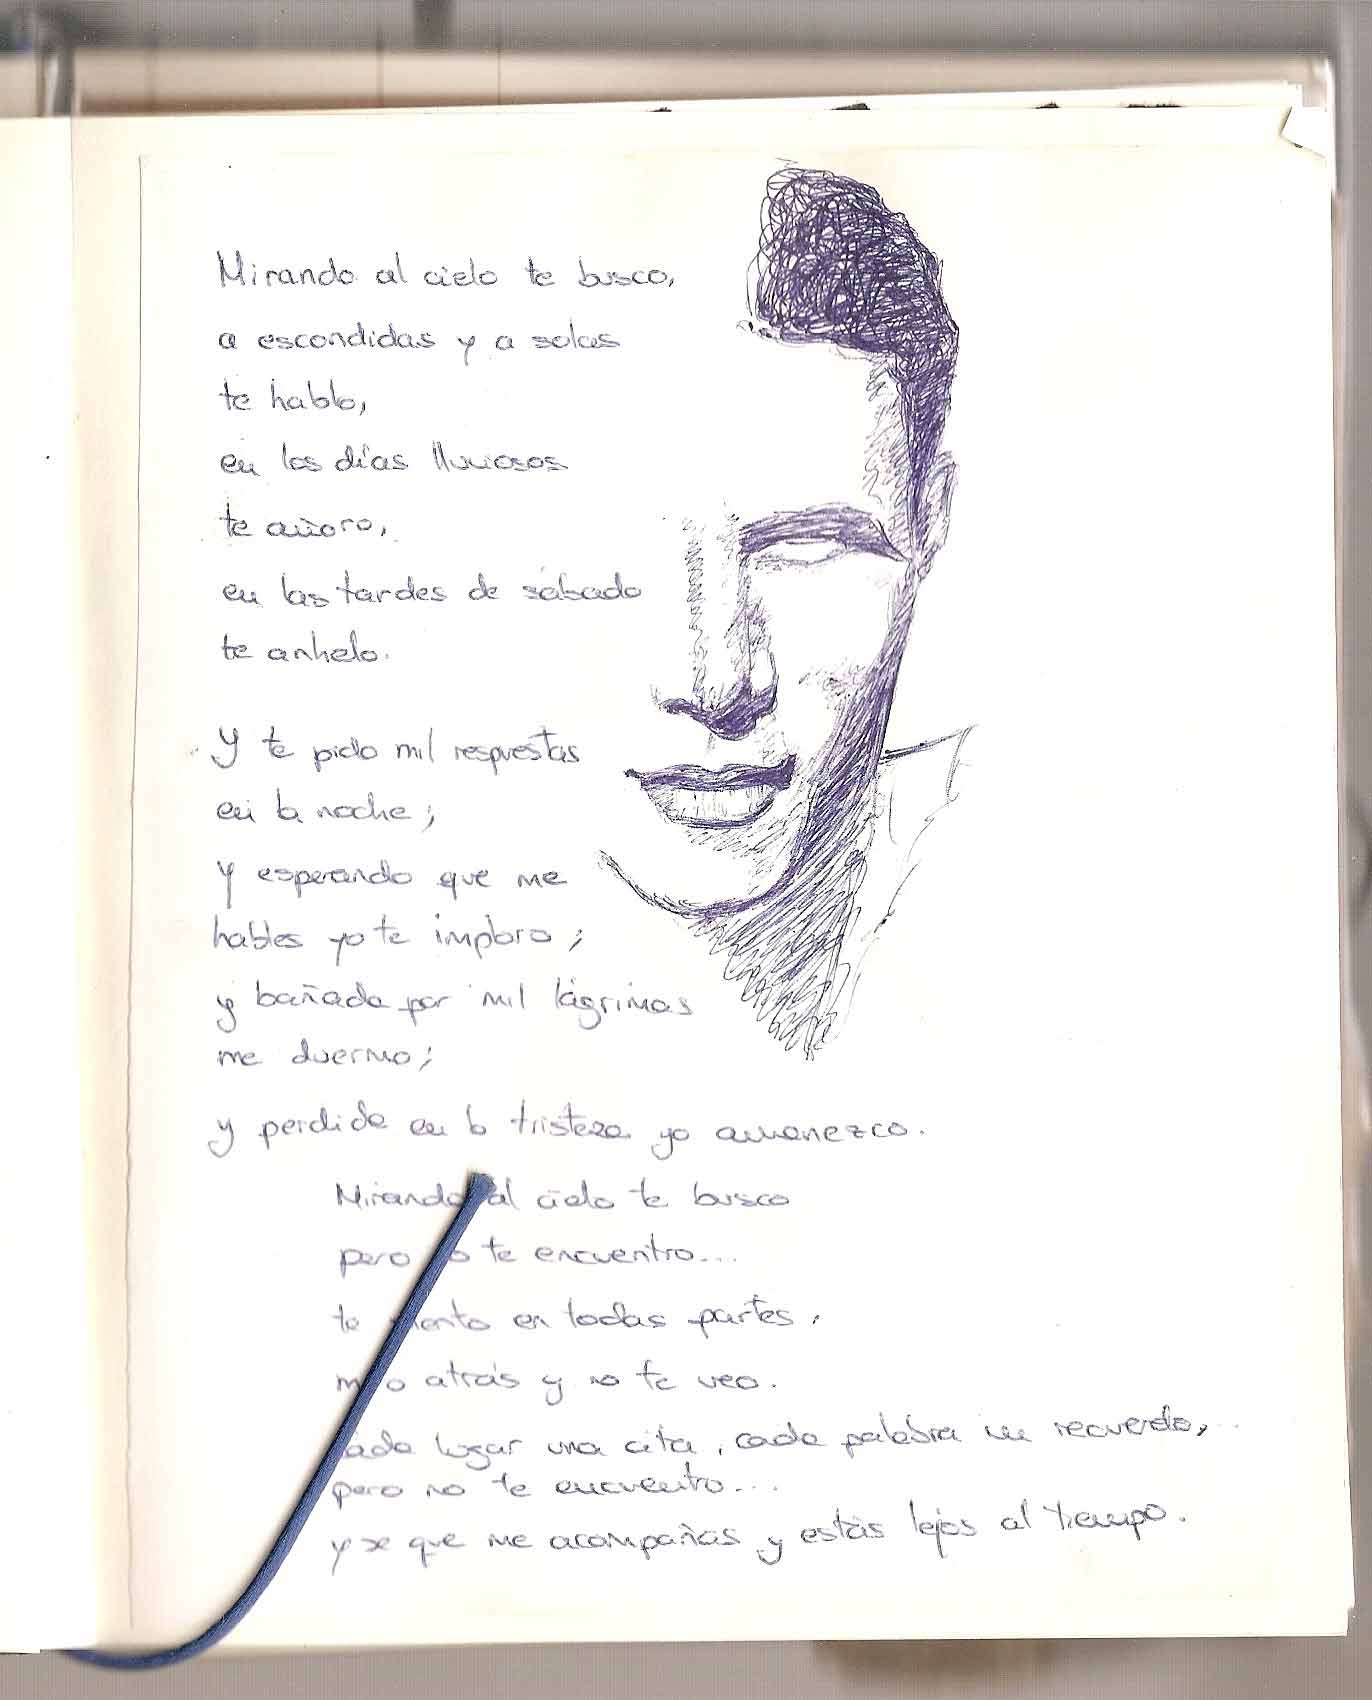
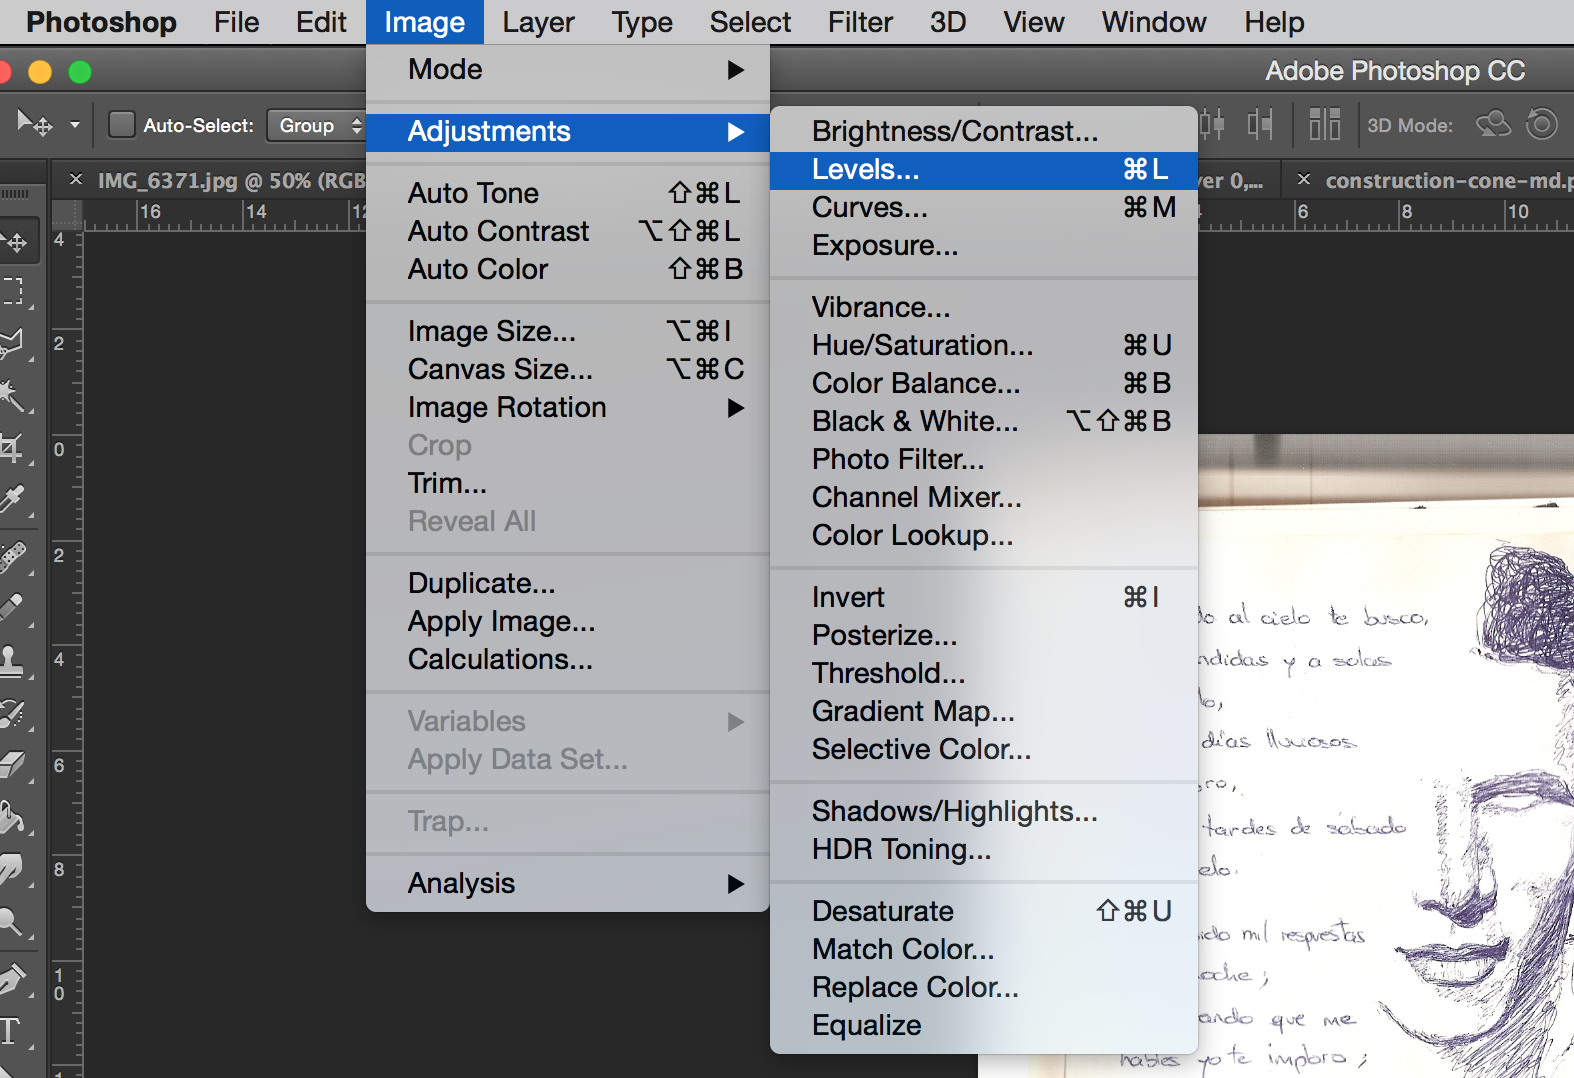
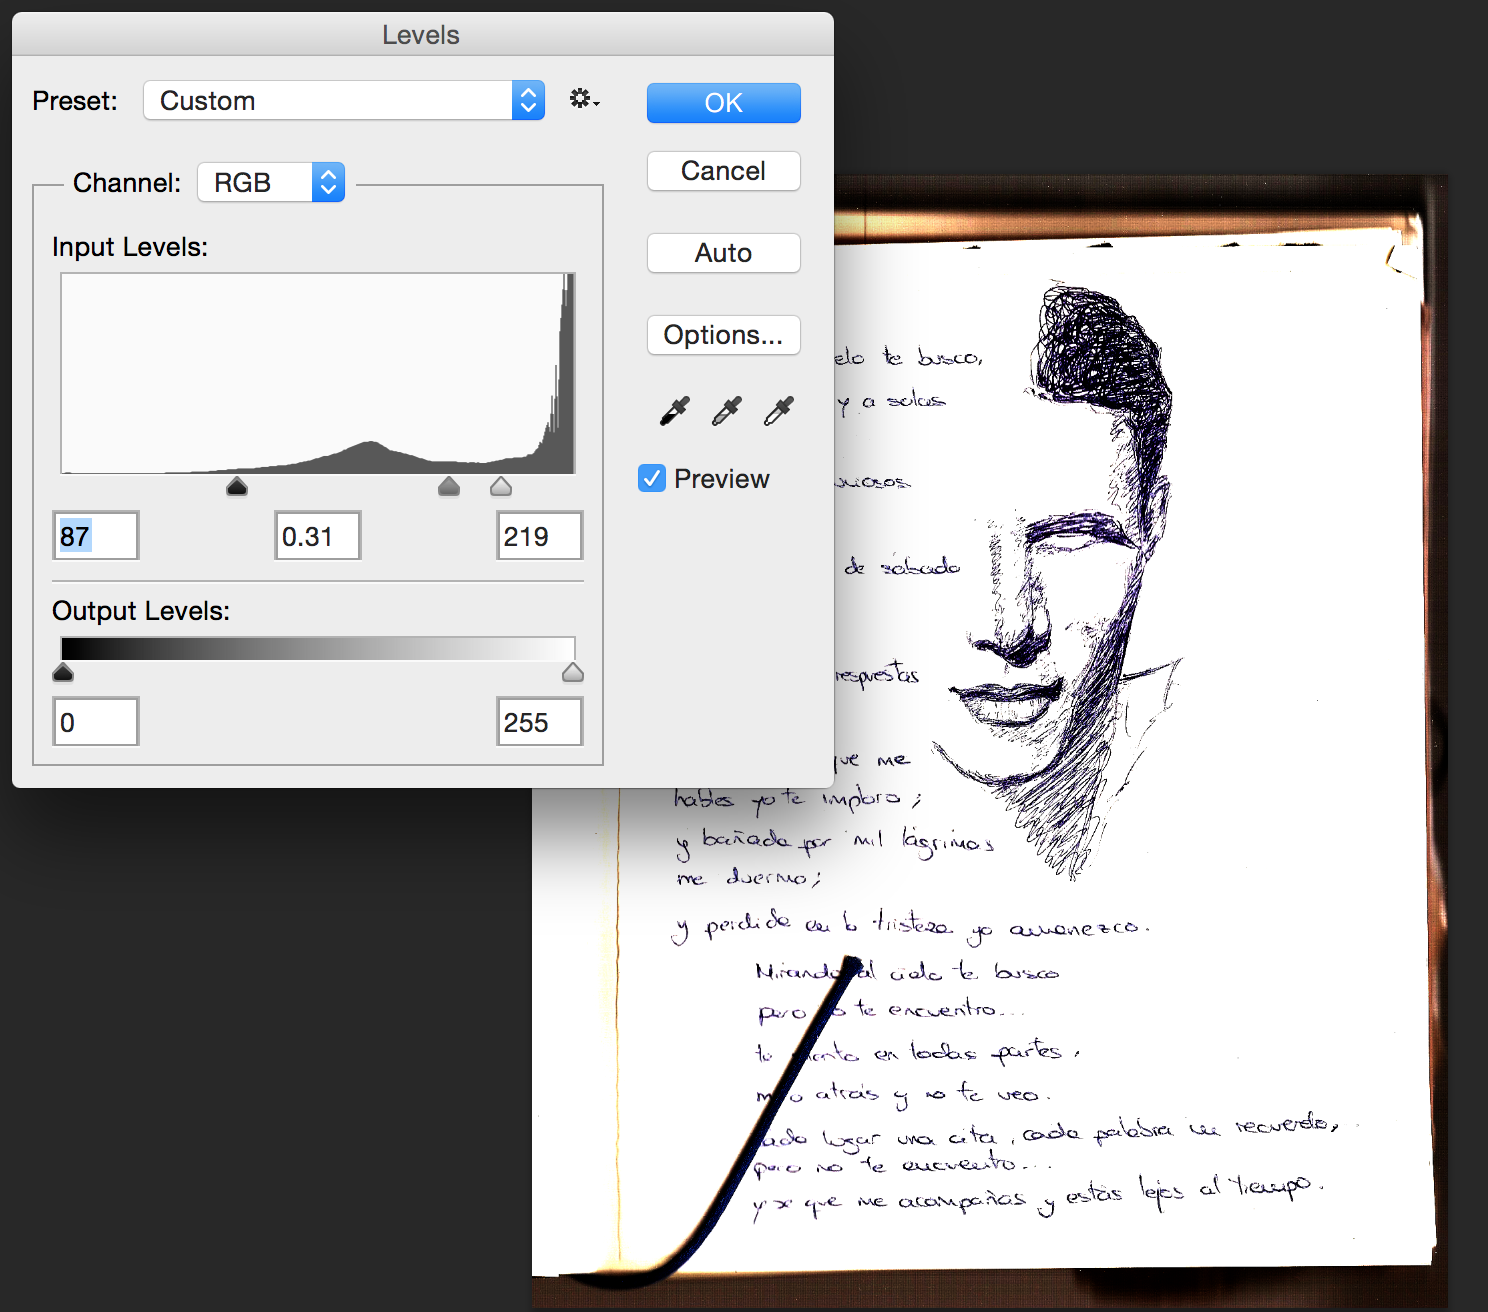
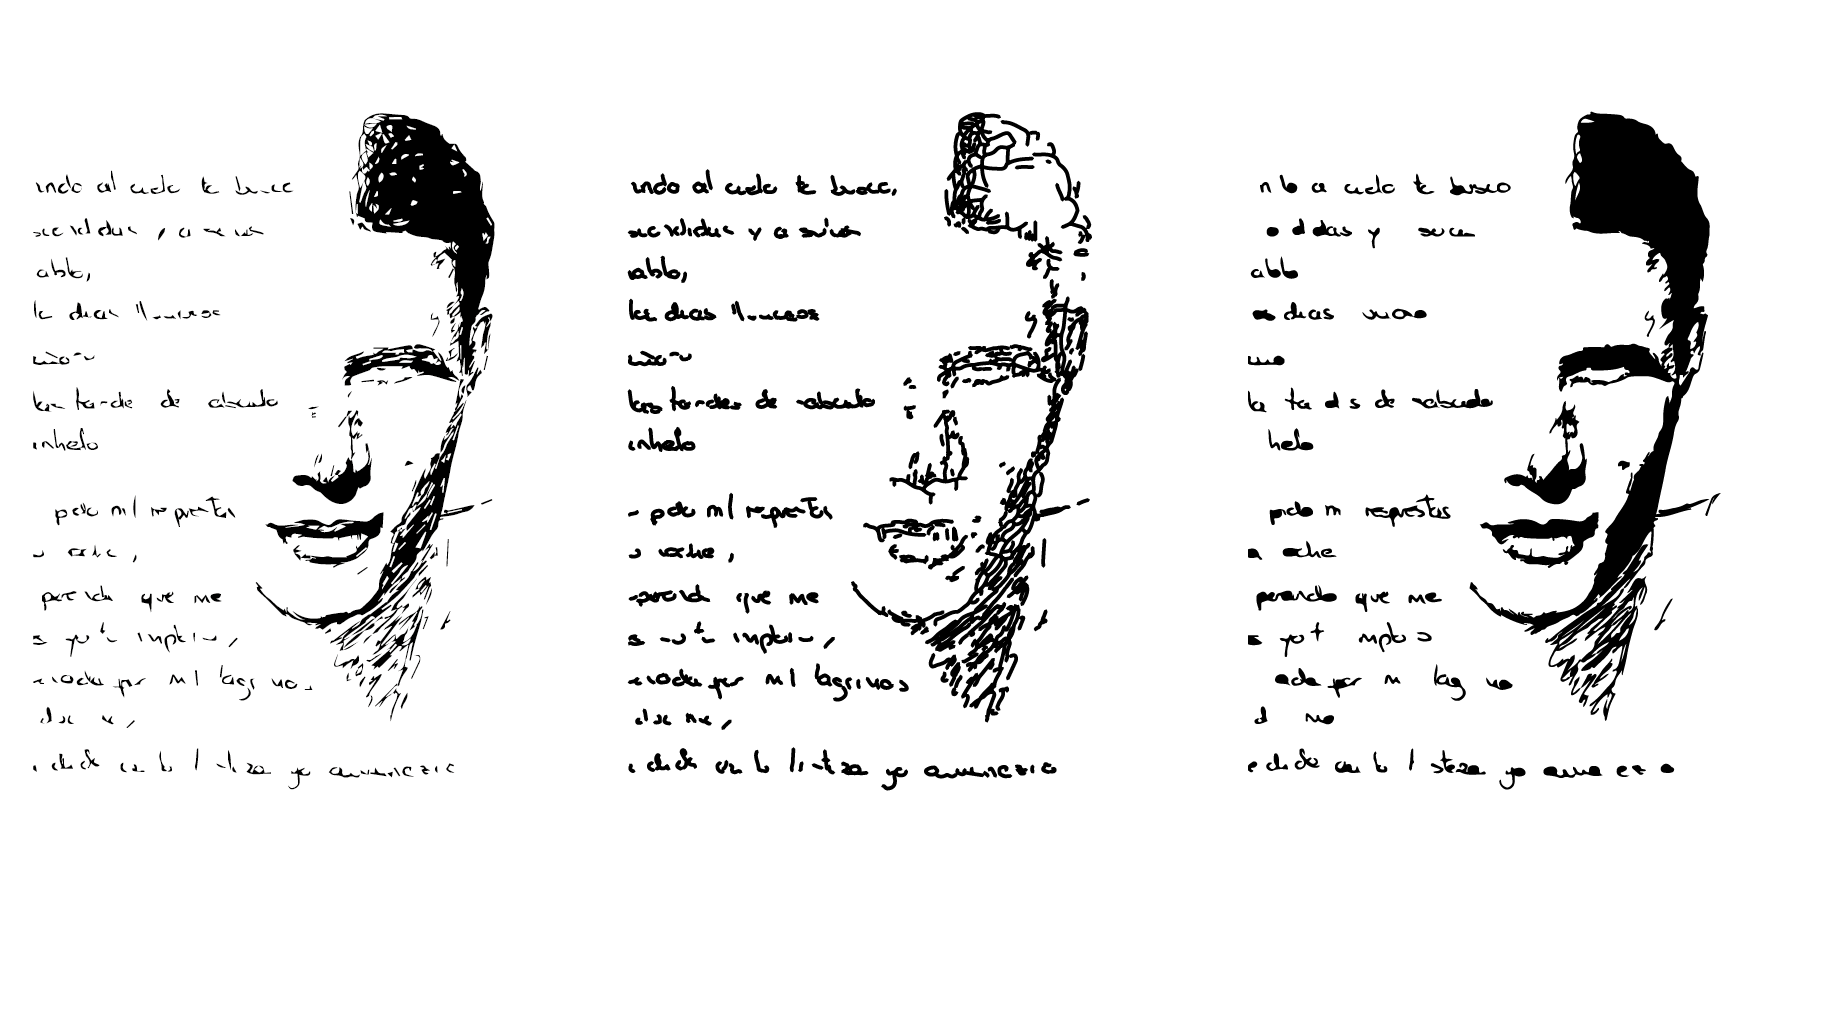
In this example we are using a simple scanned image from a poem with an illustration where we are able to see the differences between the colour and the texture of the paper. In Photoshop we have to adjust the contrast levels on the panel “Levels” in order to get a consistent white background.
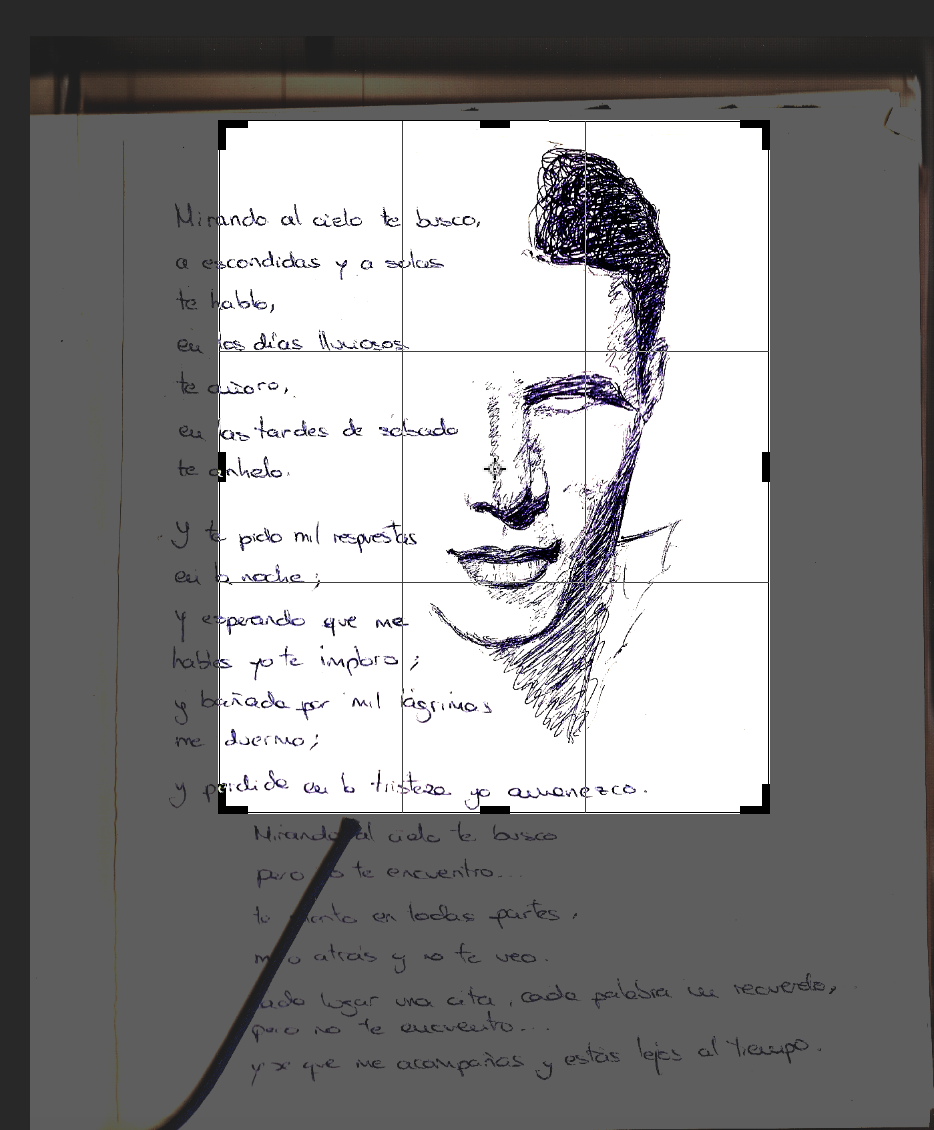
Now we crop the picture and we save it in a .png or .tiff format (high quality) so we can open it in Illustrator.
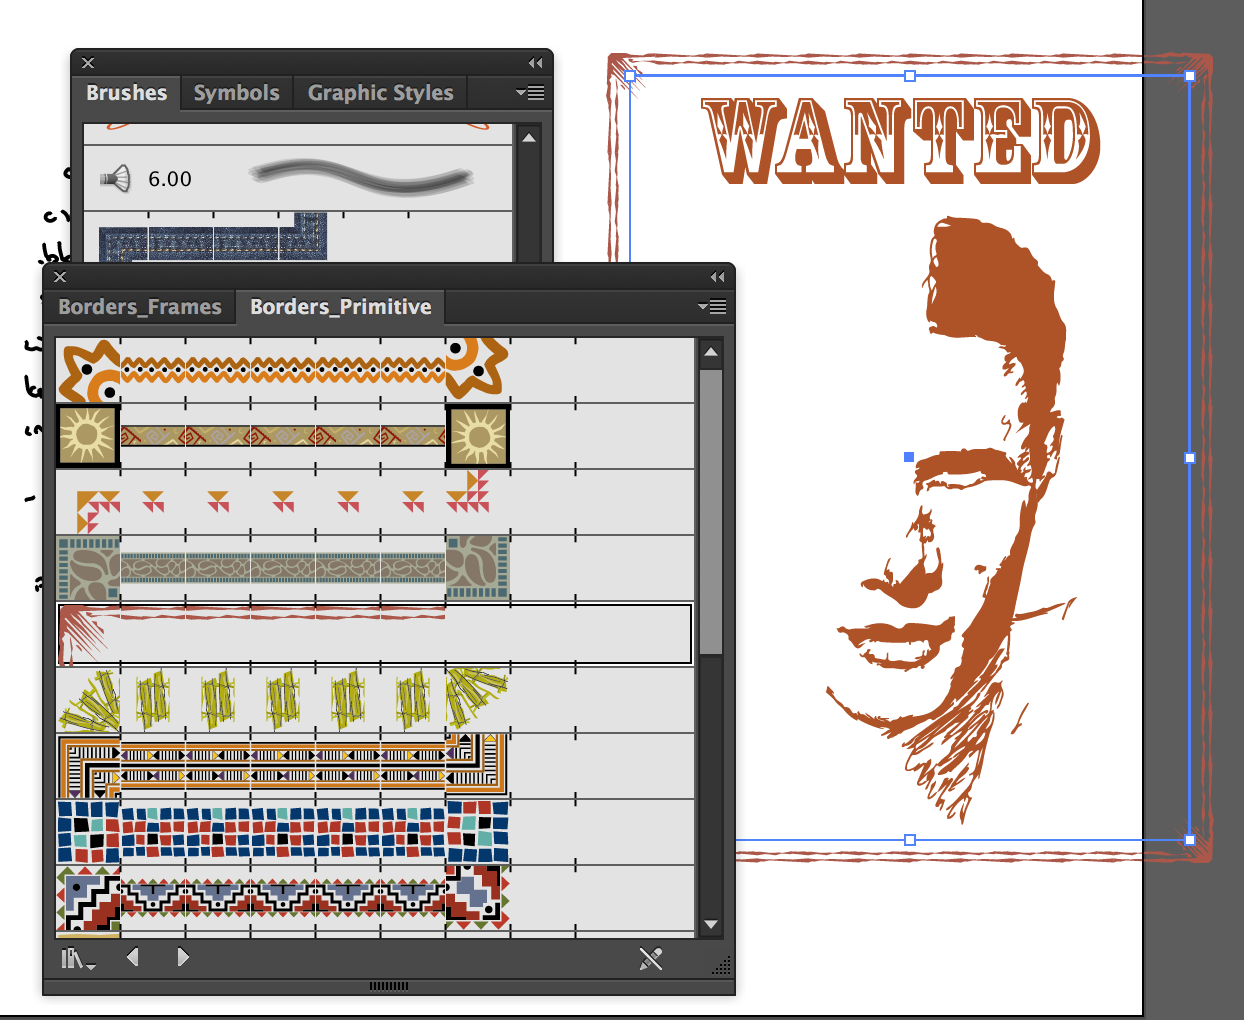
Once we are in Illustrator, we have to select the image, go to the top menu and choose “Image Trace”. With this function we will turn the picture into a vector element. In the menu “Image Trace” we have a list of options which will convert our picture into a full coloured vector, a grey or a black one (depending on if we want a finish that is more or less conform to the original or if we prefer a more simplistic design like a sketch or basic illustration. We encourage you to play around with the different options in this menu and to experiment.) In our example we show three different finish options.
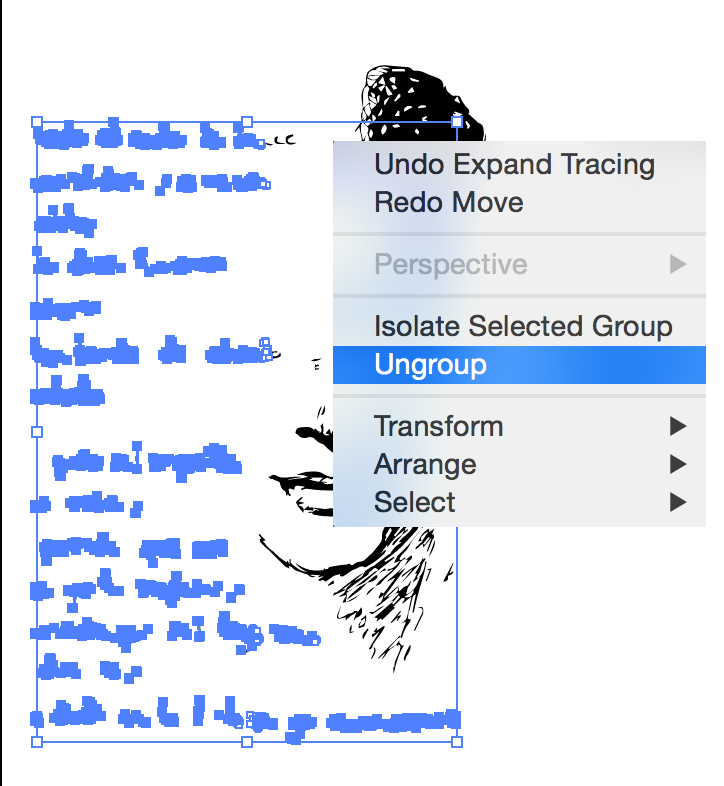
Now it’s time to select the reconverted vectorial image and to click on „Expand“ in the main menu again.

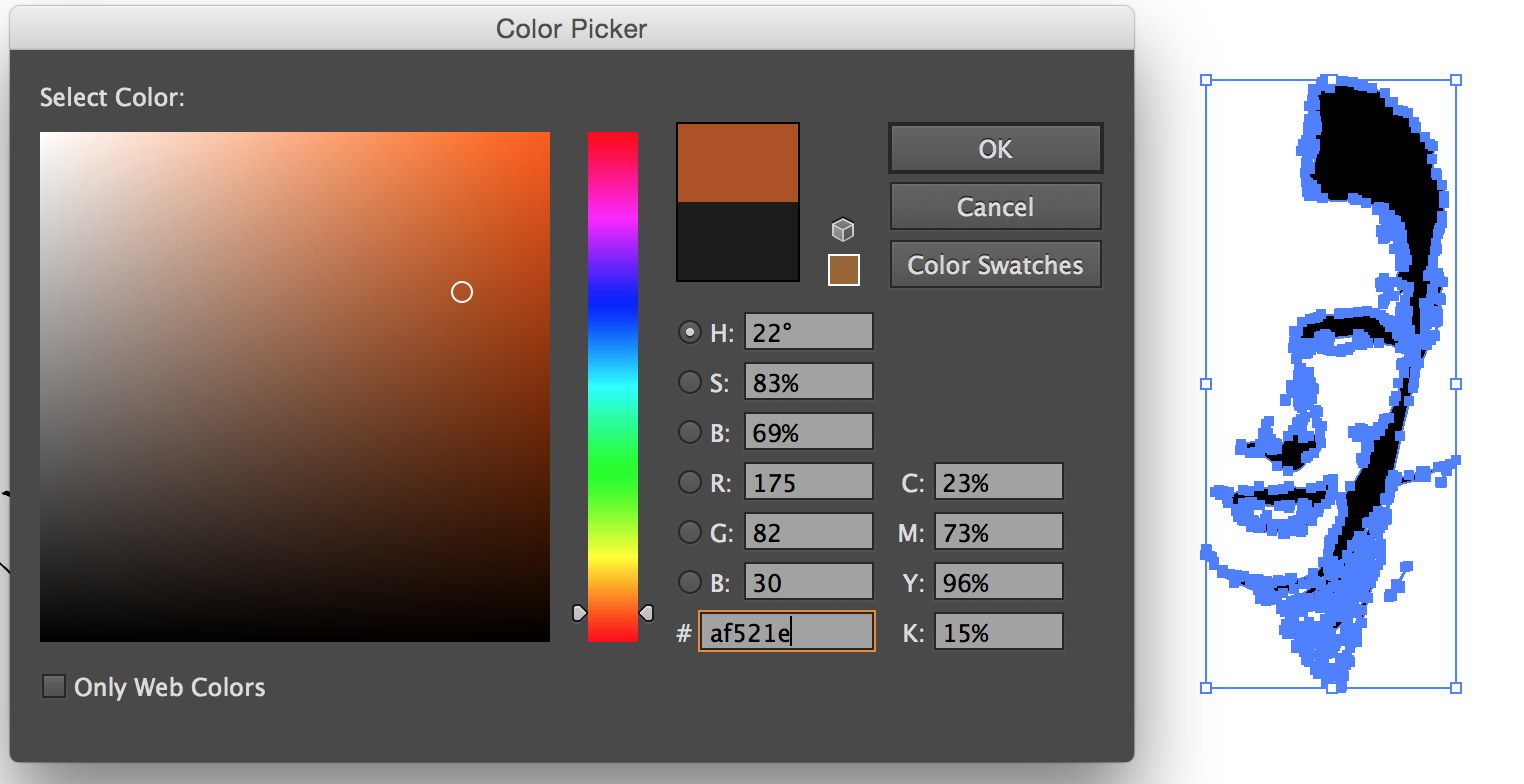
The image will be broken into vectorial points and if we ungroup (on Object/Ungroup) we will be able to eliminate the white background to choose a transparent background image. We can also eliminate all those lines or traces we don’t want to keep and colour the design the way we want it.
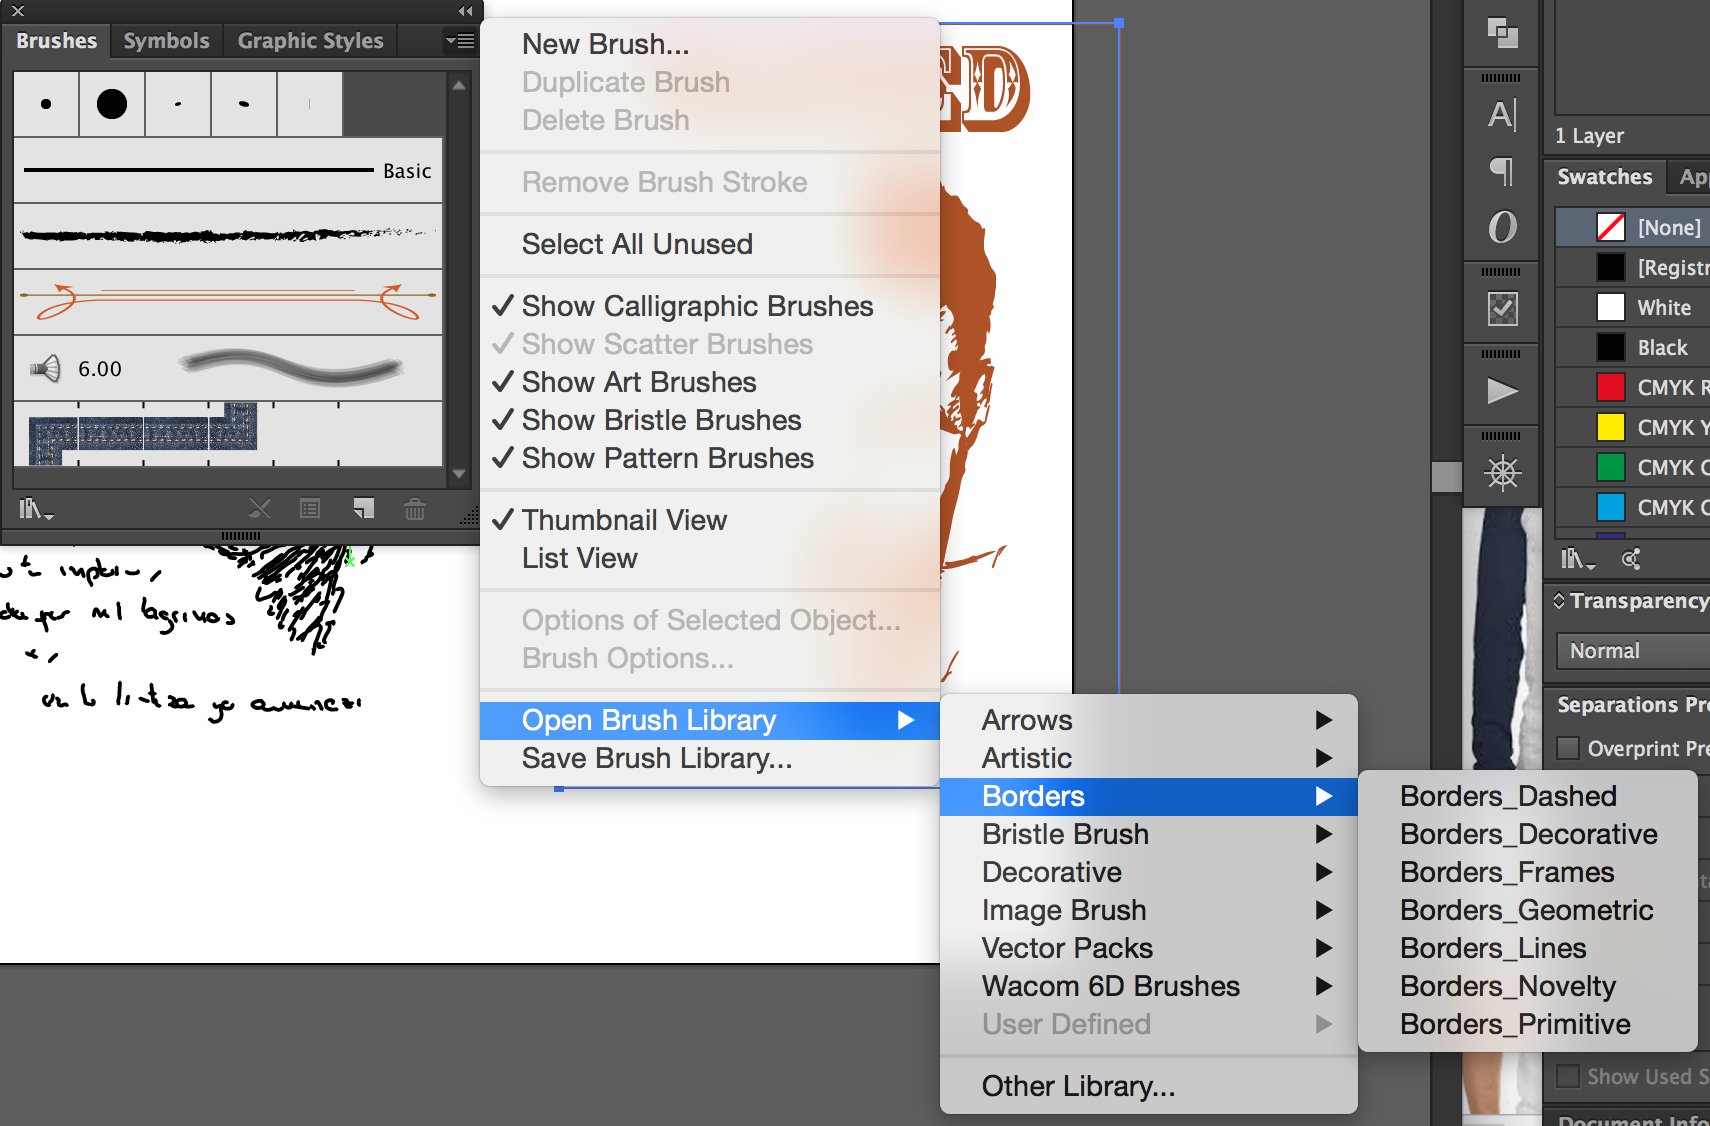
We can also add other items in our creation such as text, borders…
Once we are happy with our creation we have to export it into a .png format (so we can keep the transparency) and it will be ready to be uploaded into the Easyprint’s FreeDesign tool.
How to eliminate the background in a logo with Photoshop
It’s time to conduct an important business presentation or to participate in a trade show or event and you need some promotional items. Of course you don’t even remember who designed your logo (it was a long time ago) and the only file you have is a .jpeg one with a white background instead of a file with transparency such as a .png or .tiff.

We will now have a look at the steps to follow in order to eliminate the background:
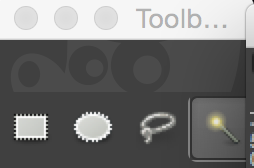
1. Use the magic wand or Polygonal Lasso Tool to select the background colour you want to use. The use of the magic wand is more effective for vectorial logos with solid or plain colours, whereas Lasso Tool is more recommended for complex logos and those with 3D effects, shadows or gradients.
2. Once the area is selected, we have two different ways to delete the background:
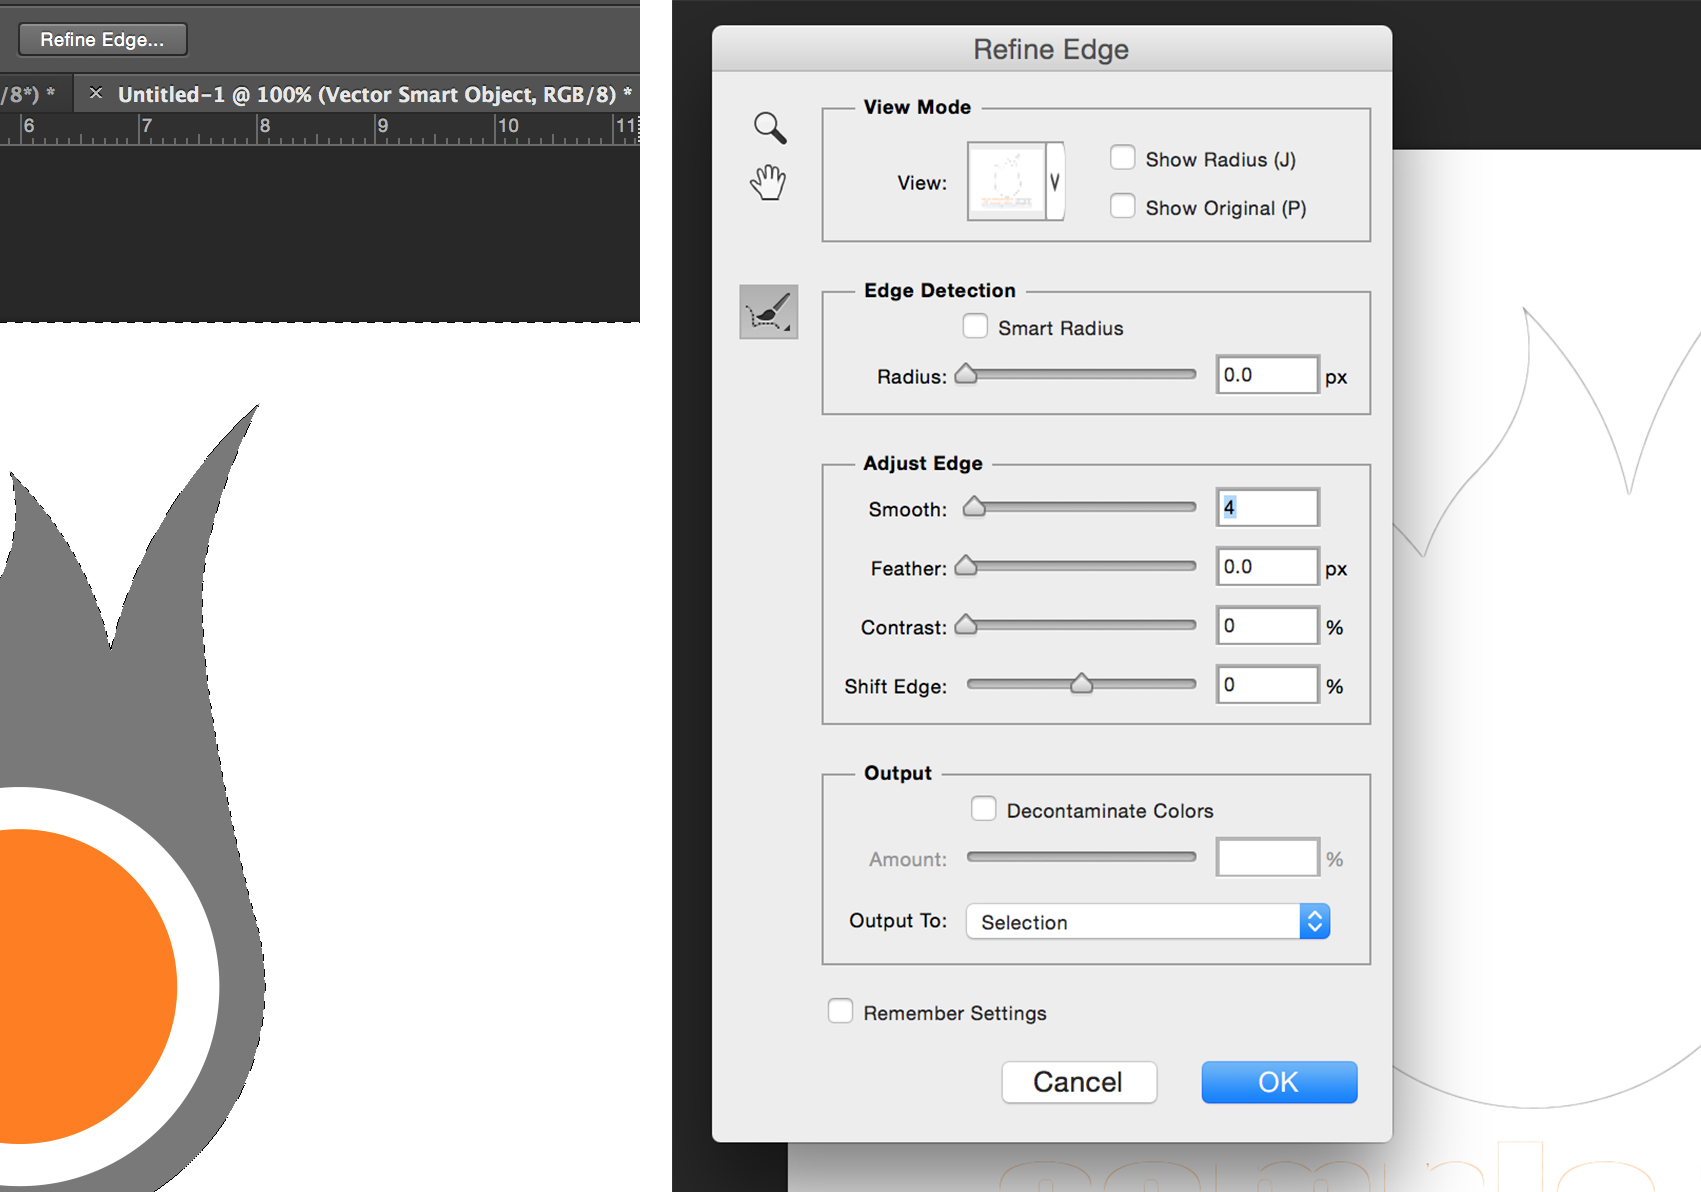
a. Select “Refine Edge” in the top menu (with a “smooth” effect of around 3px) or
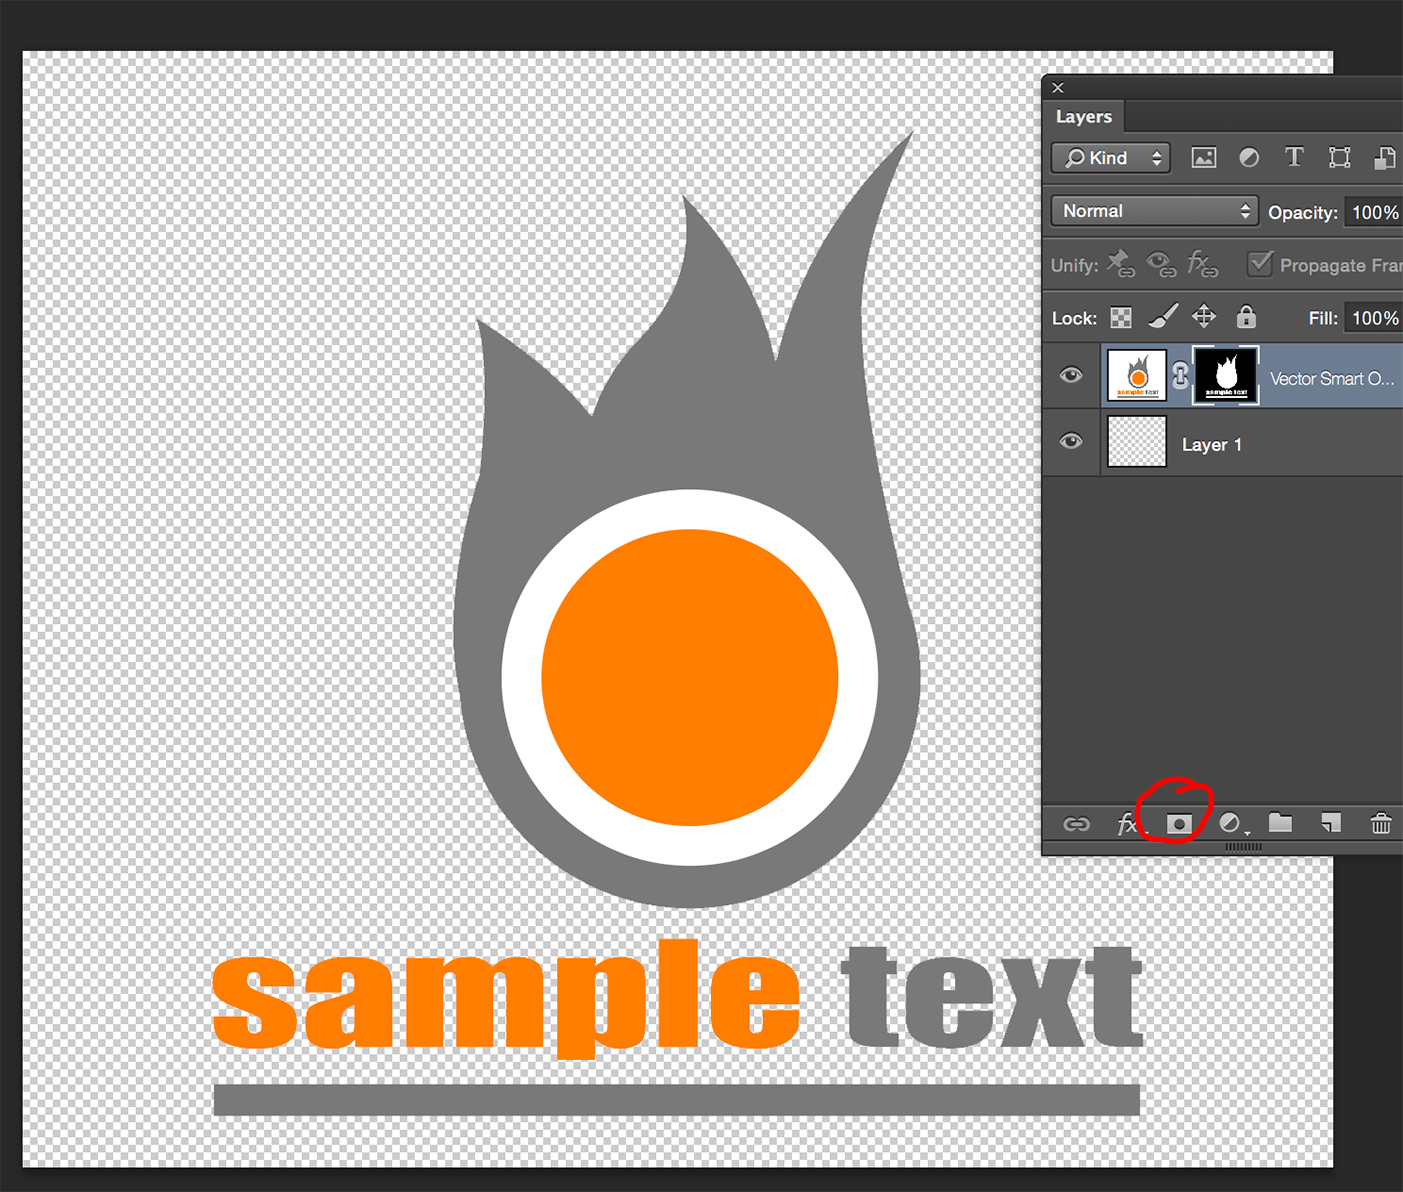
b. After clicking Select/Inverse in the top menu, choose Layers>Add layer mask. This option is more recommended because it will let us modify the selection and come back to the original if we delete the mask.
3. Don’t forget to export the file as a .png or .tiff to keep the transparency.
You can also follow the process we explained for the illustration of the t-shirt at the beginning of the article and open the image via Illustrator to turn it into a drawing – even though this option is just recommended for logos with solid colours and non-complex forms.
How to delete the background of your images with Gimp
If you don’t work with Photoshop, Gimp is an open source free software that can be downloadedand allows to manipulate and transform images and pictures with great results. Here we explain, in just a few steps, how to delete a picture’s background to make it transparent.
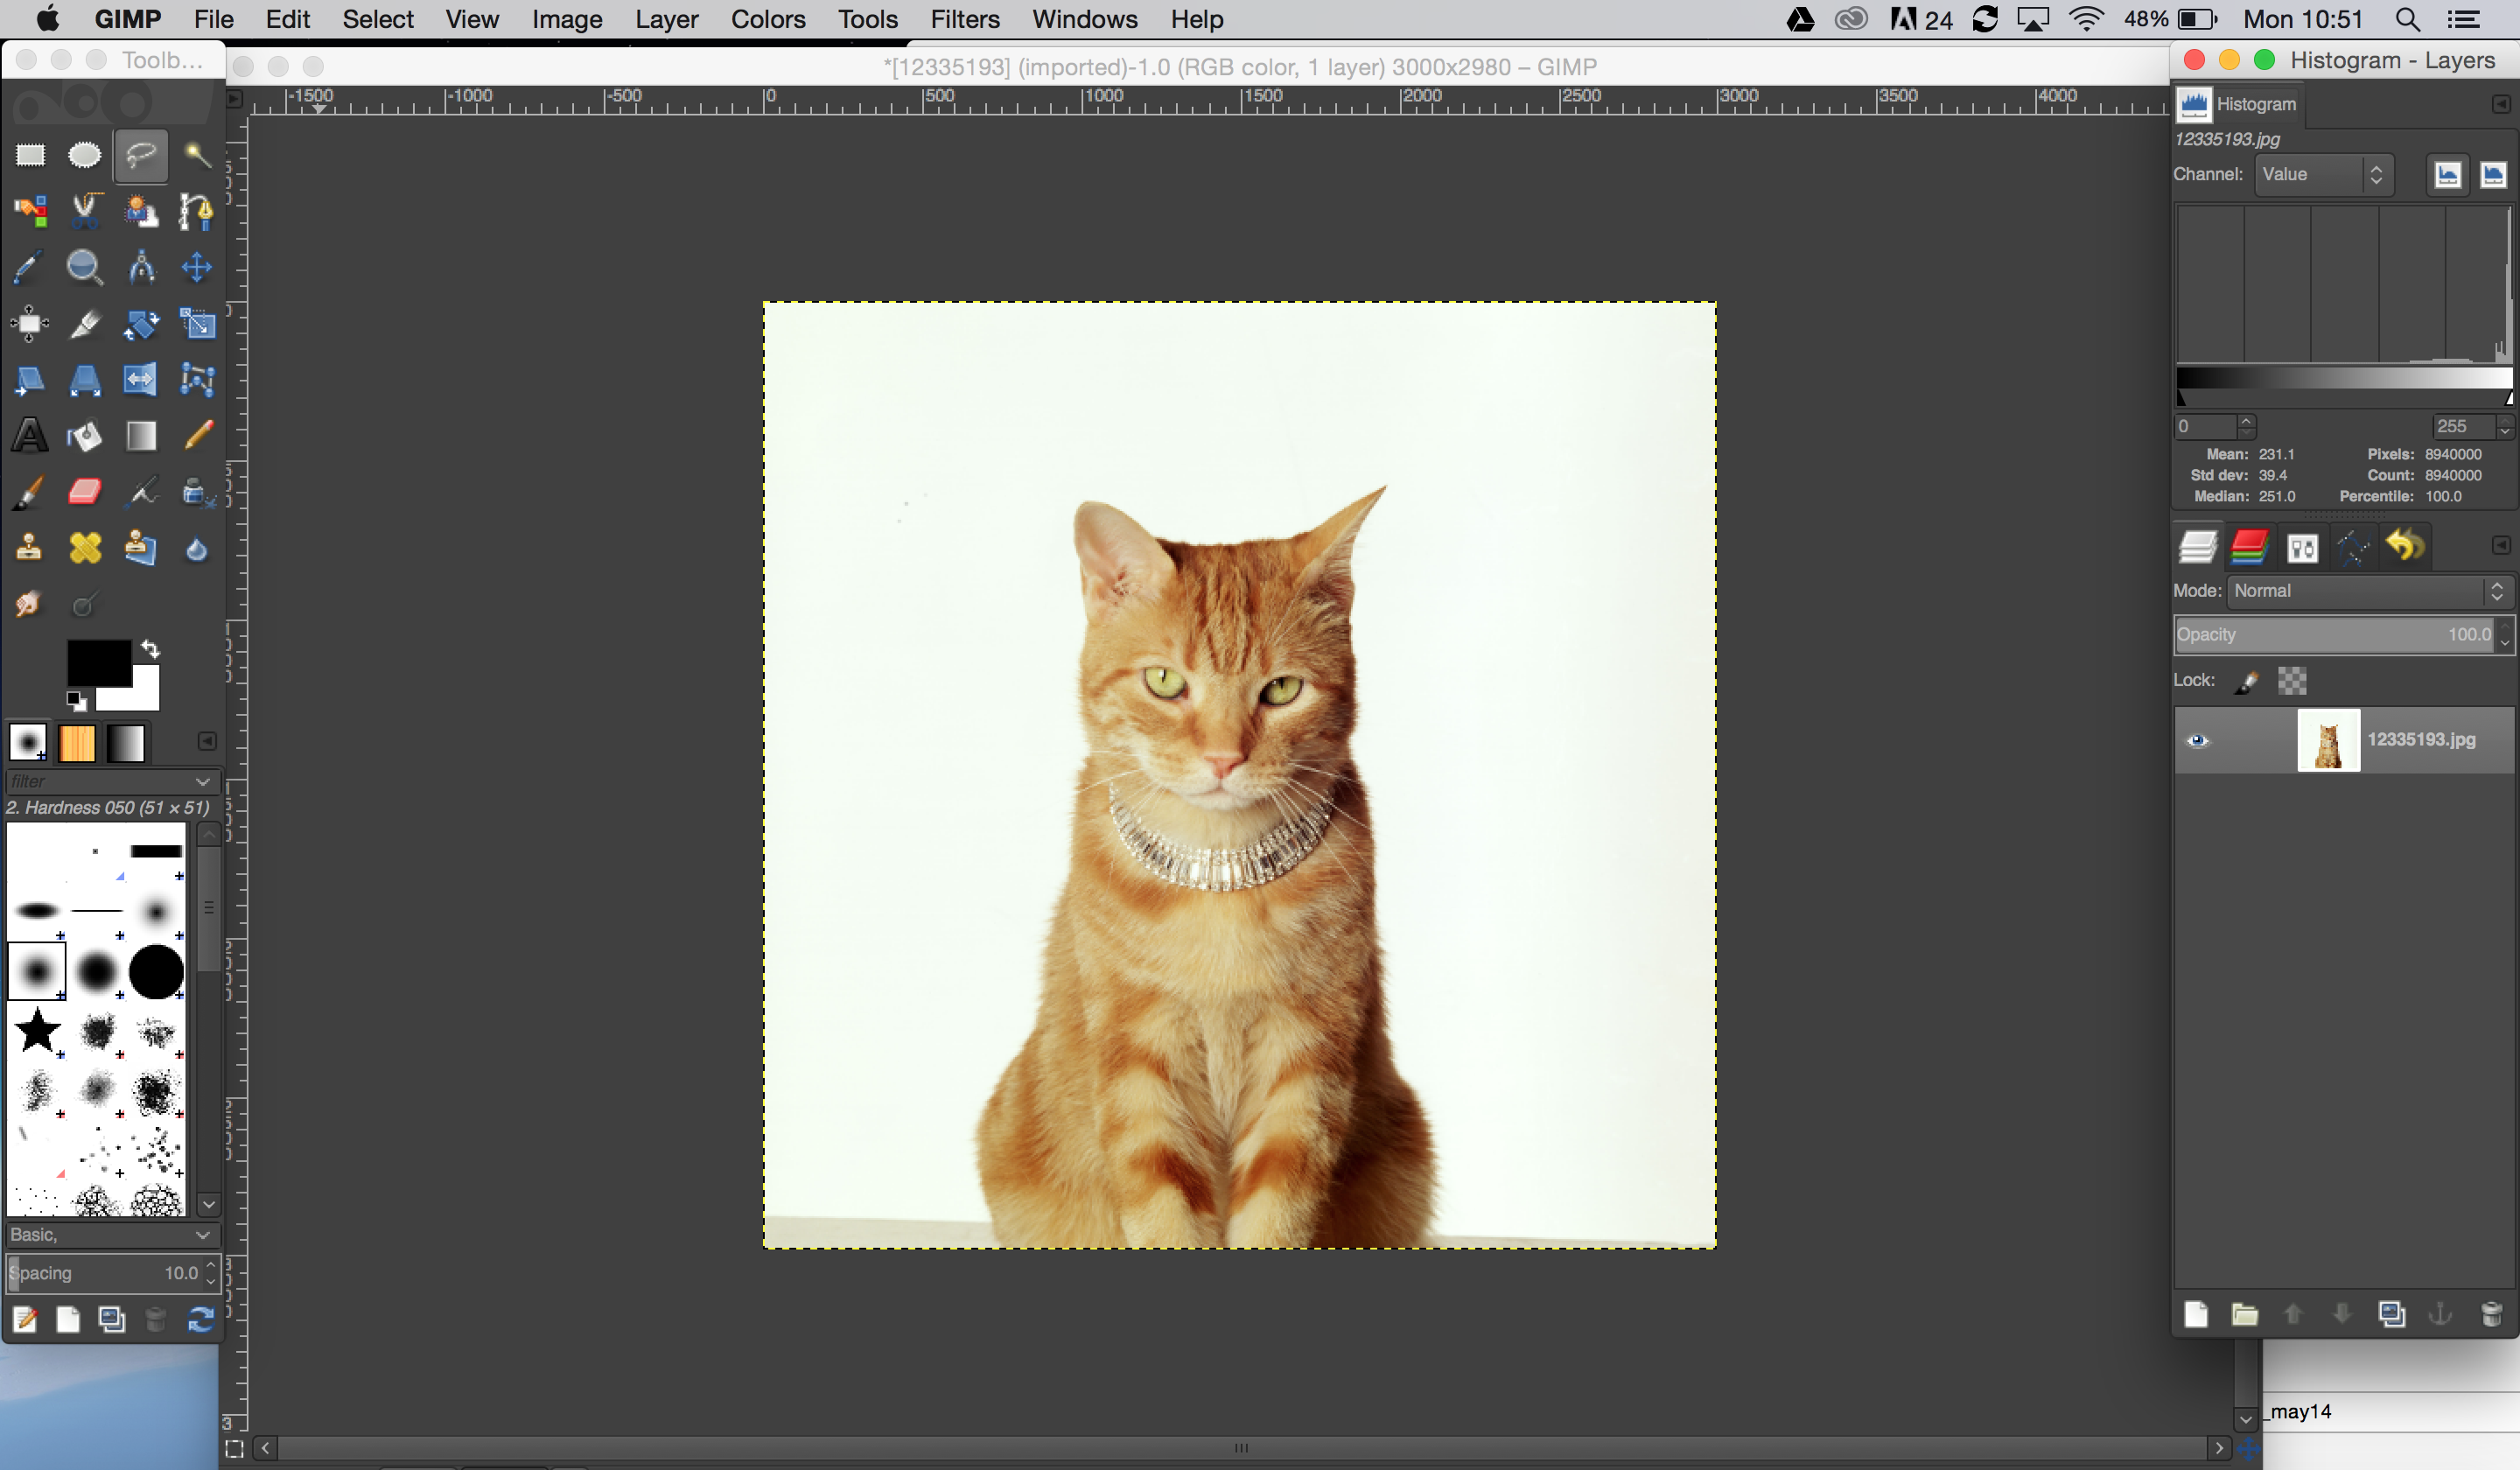
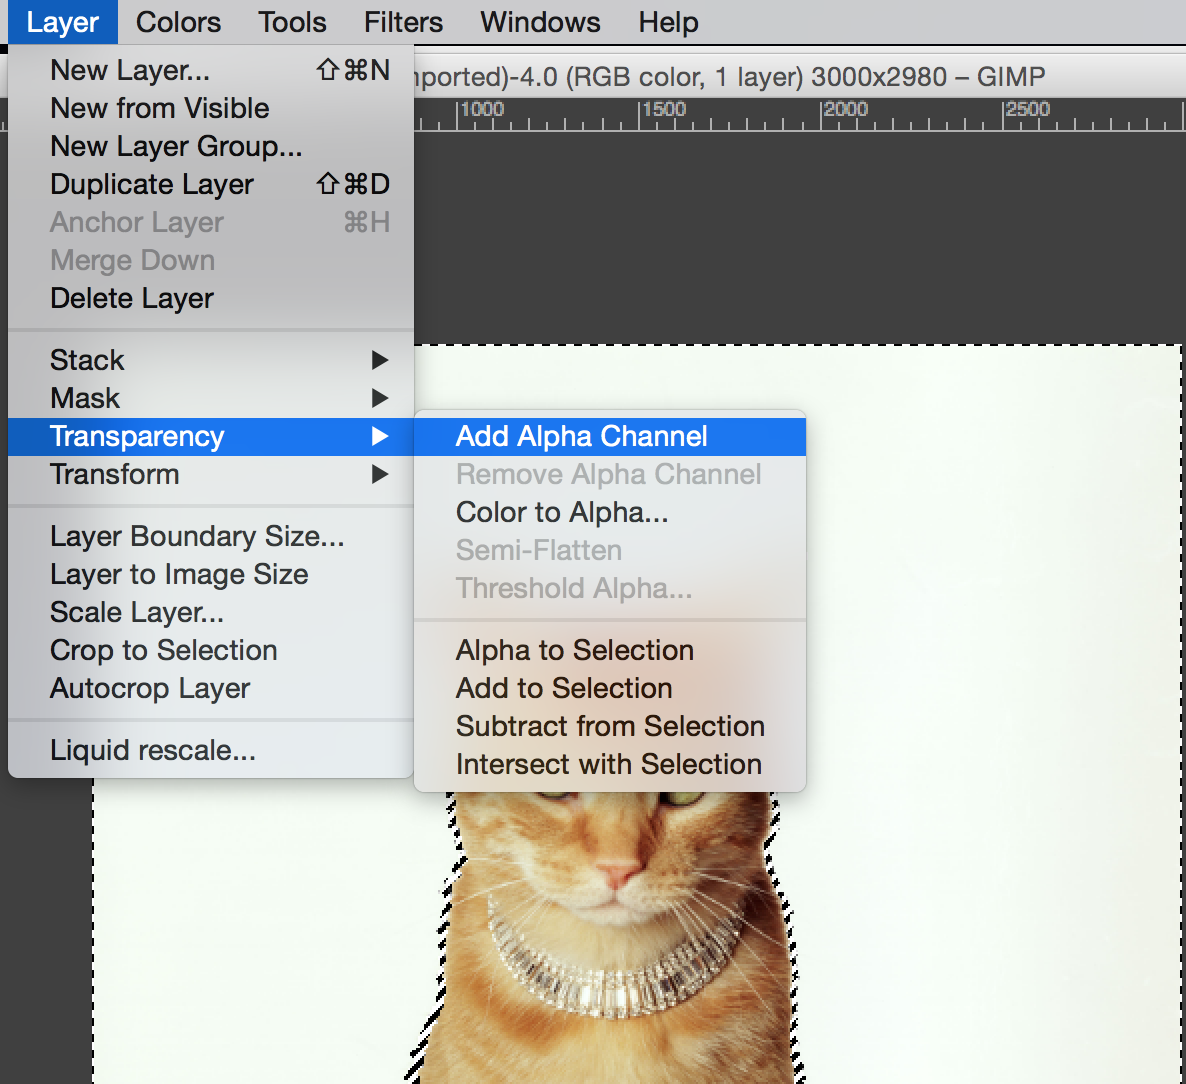
1. In the tools menu in Gimp, select “Fuzzy Select Tool” and click on the background of the image you want to delete. Depending if that’s a uniform colour or different designs with shapes and colours you might have to repeat the process a few times in order to select the whole area of the picture you are editing.
2. Once the selection is done, in the top menu “Layers” select “Layer/Transparency/Add Alpha Channel”
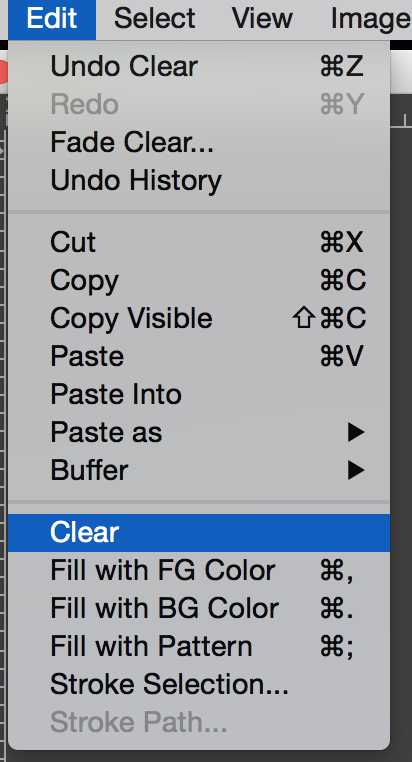
3. In the top menu select“Edit/Clear” and this way you will eliminate the background
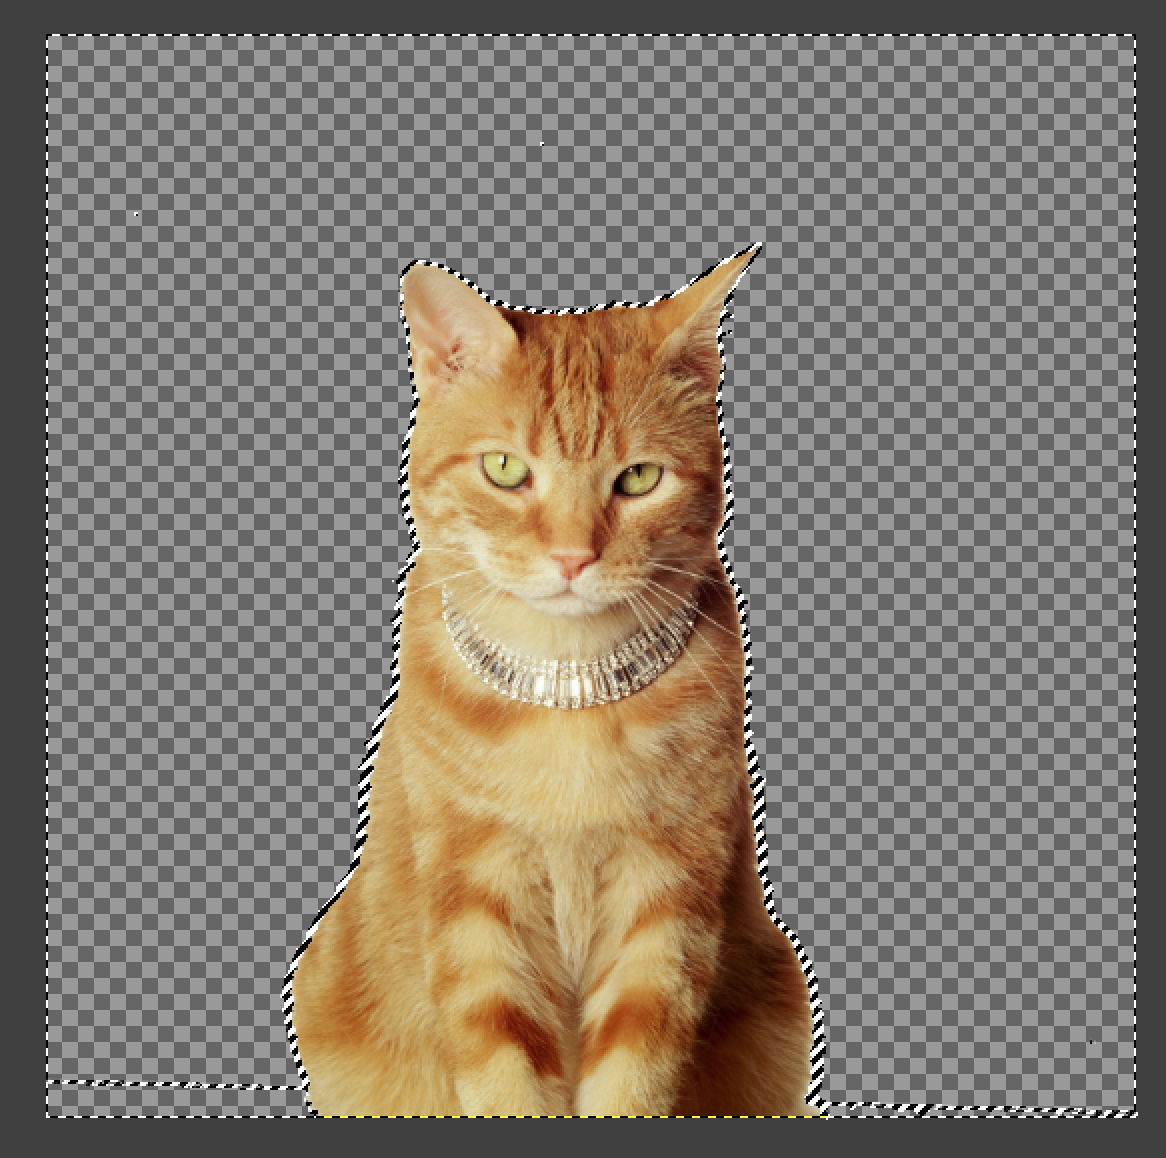
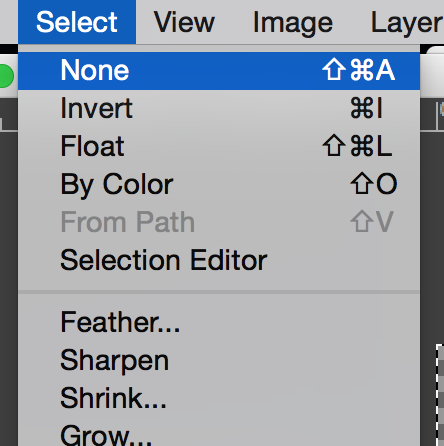
4. To deactivate the selection click on “Select/None”.
For the next step we need the “Eraser Tool” from the main menu to outline all the areas that are not perfect.

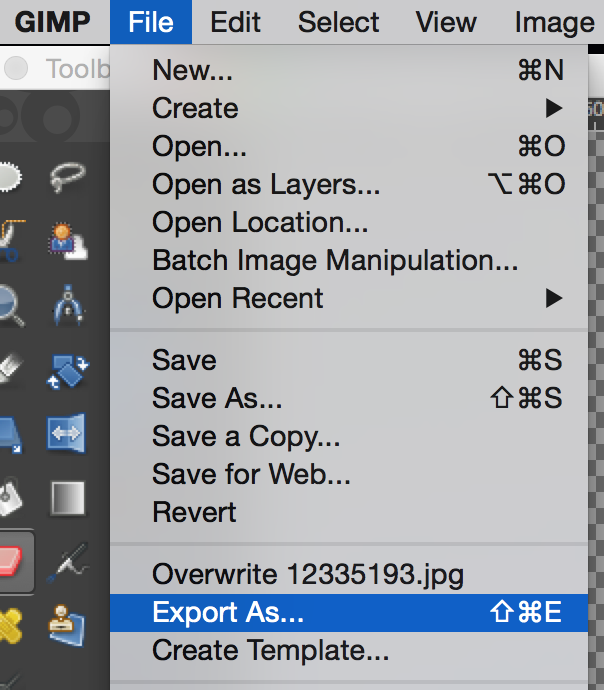
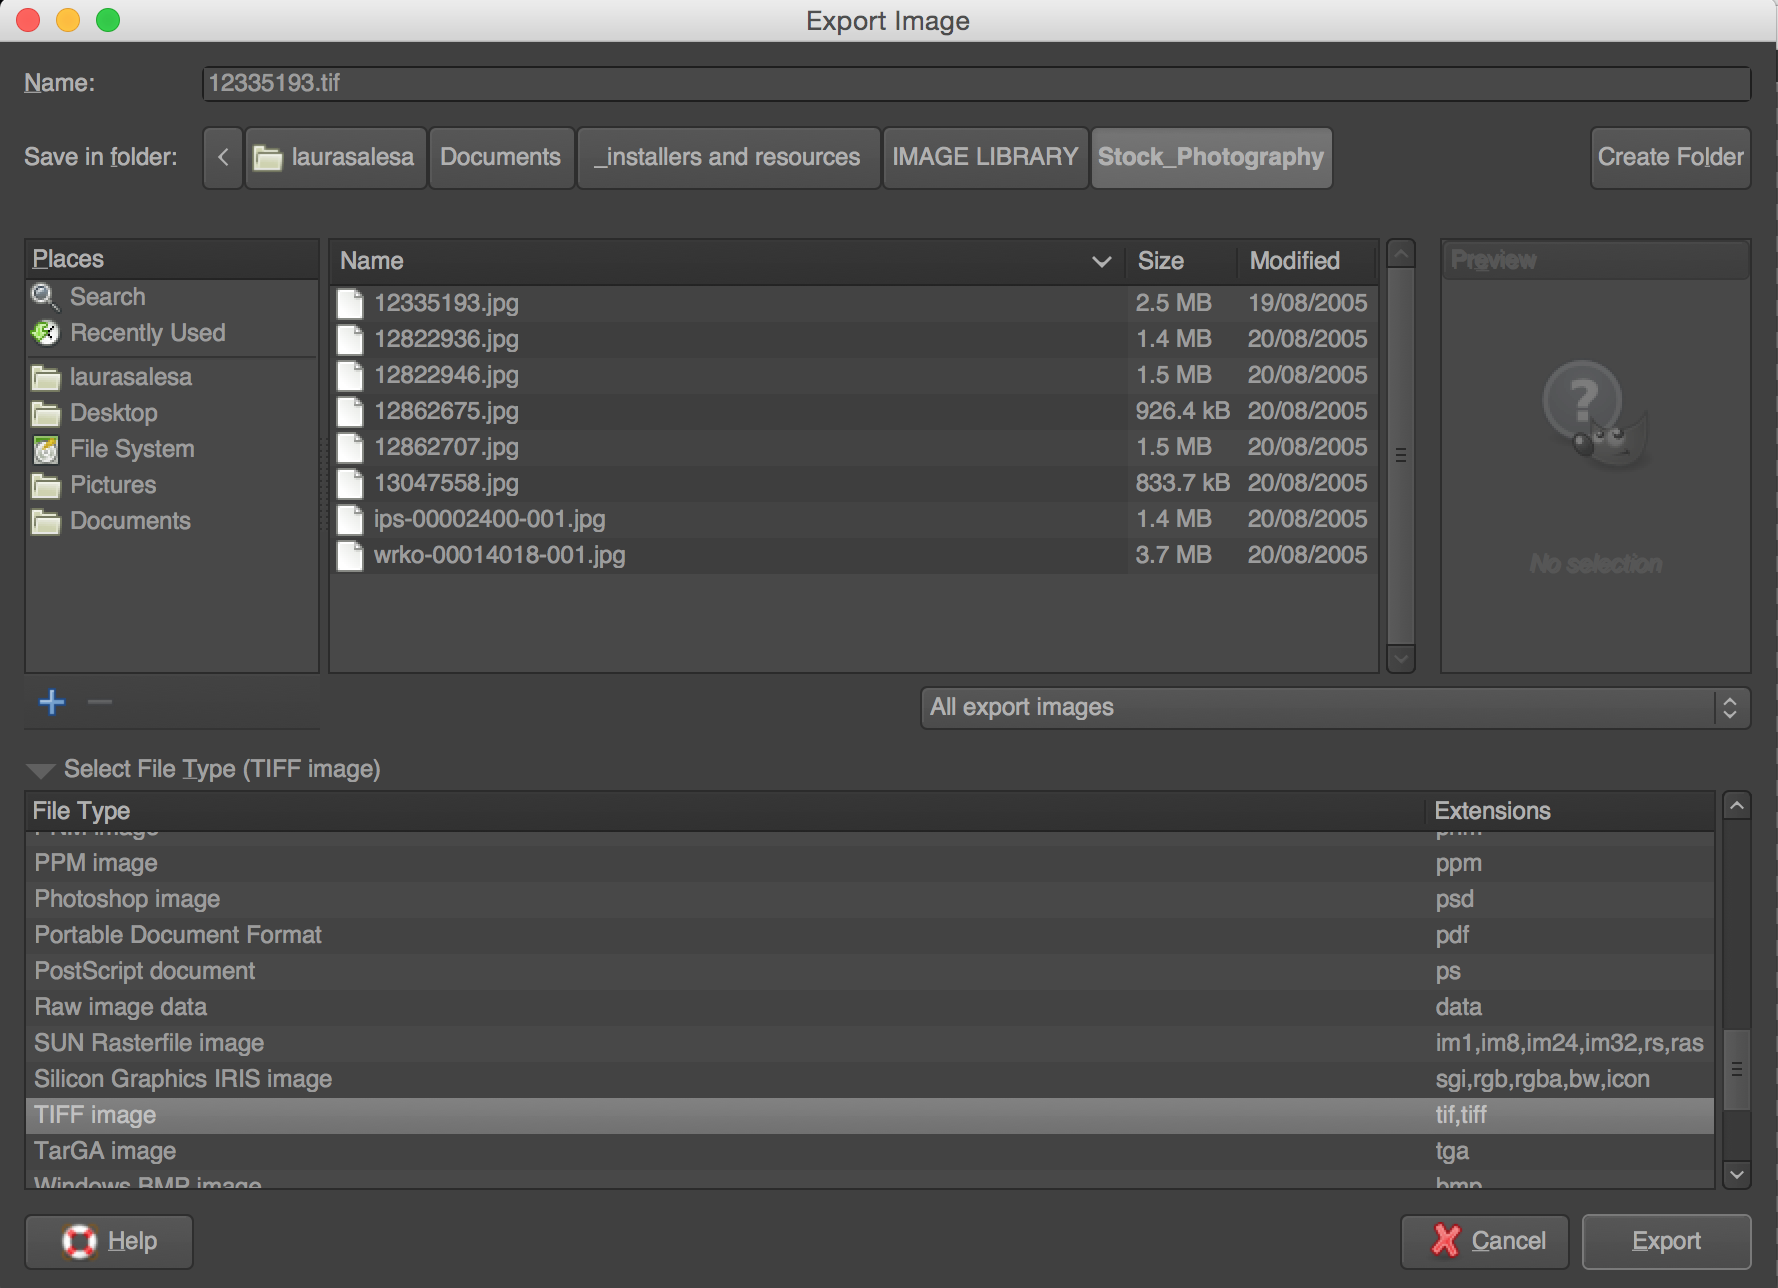
5. Once we are happy with the result, we can go to “File/Export As” and save the file as a .tiff or a .png to keep the transparency.
Are you ready to start your design?
Yes i am ready for start your design thanks for your help.
background remove type of work if you want to remove background you have to do clipping path, masking , selection etc by using this Technic
This is a really good and more necessary idea that you have described properly about delete-background. I have more benefited from this post. thanks a lot for this best article.
I think you have used Photoshop and GIMP very well for removing background of a logo and image. I want to say thanks from the bottom of my heart for sharing the 2nd tutorial (the logo one). I was looking for something like that since so long.
The tutorials are properly described and pretty neat and clean. Anyone would understand how to do these works. I got to learn some new things. My personal favorite is the 2nd one. The tutorial of the logo is amazing. Thanks for the share!
Excellent article about. Nice reading. keep posting in regular basis. I will waiting for your next post. It will helps me a lot of and some things clear to me.
Thanks for sharing a valuable post.
this so much needful post.thanks a lot for sharing.
What a magnificent tricks ! Really enjoyed it. Thanks a lot for sharing.
Amazing tutorial.Thanks for sharing.so easy steps.Really like it
Just a wonderful tutorial for me.Thanks for sharing with us
Very effective tutorial about removing background.Thank you. I will suggest this to my friend who wanted to learn about this background remove technique.
This merhod is good but not perfect and easy. Try out this method to remove you background completely without any edgemarks. After tracing image go to magic wand and select the white background in the image and hit delete to remove completely from the image. This is very simple and perfect way. You can also find here in this video. https://youtu.be/PmWWXLloR88
Really so helpful post for me. I learned a lot from this blog. Within last few days, I am trying to learn how to remove or delete image background. At the last I find out your blog. Many many thanks for sharing with us.
You write the full details about delete background remove. I learn a lot from this blog. Many many thanks for sharing with us.
Really we wants this types of post..more and more
Really we wants this types of post..more and more then we can learn more and more .So please this type of post
If some one wants to know about the details of background removal service at that type of situation i want to say this post is really helpful for him…
keep posting in regularly then we are learning regularly,and do our best .Thanks
Wow! as tutorial this is really ideal one. And this article is so easy to understand because of this is the one of the easiest way of clipping of an image. No unusual scarp are use in the article which is makes it so professional. Very useful
Fantastic article about delete images background. Thanks for everything.
You have provided a nice article. Thank you very much for this one. And I hope this will be useful for many people. And I am waiting for your next post keep on updating these kinds of knowledgeable things. And thank’s again to sharing us.
Magic wand tool or polygonal lasso tool both are very useful to remove background no matter its logo or any other things